Register your business domain or transfer your domain to Casbay anytime.
Register Domain
Choose your domain extension with affordable price.
Register AU Domain
Get your domain for local business in Australia.
Domain Life Cycle
Understanding how the life cycle of a domain works.
Domain Privacy Protection
Protect your private information with Whois.
We offer range of hosting services that support the demands of your website, or application.
Web Hosting
WordPress Hosting
Dedicated Servers
Robust, secure and industrial-grade dedicated servers.
Instant Dedicated Servers
Affordable, fast, reliable.
Server Management
Reliable management services for your VPS and Dedicated Servers.
Server Migration
Professional hosting migration services.
Colocation
Gaming
Best game server for gaming.
VPN Provider
Fast, risk-free and reliable Australia VPN.
Web Dev / Hosting
Set up and run your virtual machine in minutes.
Managed Service Provider
Increase your compliance and security with our Managed Services.
Management Plans
Ease your work by adding our management plans to your dedicated server or VPS.
Private Cloud
Scalable private cloud solution hosted within Australia.
Cyber Security
Protect your assets from cyber attacks.
SSL Certificate
Build your customer trust and confidence.
Website Scanner
Complete, cloud-based website protection.
It’s not about what we say, it’s about what we do. Learn more about Casbay’s background and confidently join our growing community.
About Us
Our vision, history and photo gallery.
Our Data Centre
Tier III certified data centre in Australia.
Privacy Policy
Understanding Casbay Privacy Policy.
Promo
Check out promotion of our plans.
Client Reviews
Find out what our clients say about us.
News
The latest news and media releases.

1. Firstly, login to the Plesk control panel.
2. Next, click the Email address icon once logged in.
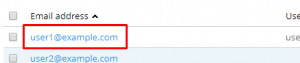
3. Then, click on the e-mail address on the mail page for the e-mail forwarder you wish to create.
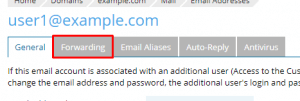
4. On the next page, click on Forwarding tab.
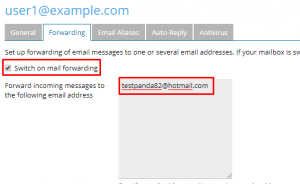
5. Enable the “Switch to mail forwarding “ box, and enter the email address you want to be forwarded, in the “Forward incoming messages to the following email address.”
6. Lastly, click on OK button and you are done.
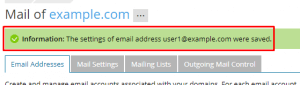
7. You should see the success message on the next screen. The success message should be viewed on the next following display.
We hope this article helped you to learn about how to set email forwarding in Plesk. For more articles, please go to Knowledge Base.
Copyright © 2010 – 2022 Casbay LLC. All Rights Reserved.