How to disable automatic updates on Server 2016.
Microsoft’s product update policy is well known. That is, they are able to receive updates periodically and install them automatically. Besides, this mechanism is very useful for desktop systems. It is helpful for users to avoid making manual searches for updates. However, in the server environment, this can have non-functional consequences as some of these updates may cause the system to reboot. In addition, rebooting the server is critical, since many services, processes, and folders depend on server activity. Therefore, it is the right option for you to disable automatic updates if you do not want the server to reboot in such way.
Well, in this guide we’ll see how to disable automatic updates in Windows Server 2016. Now simply follow the steps below:
Step 1 of 4
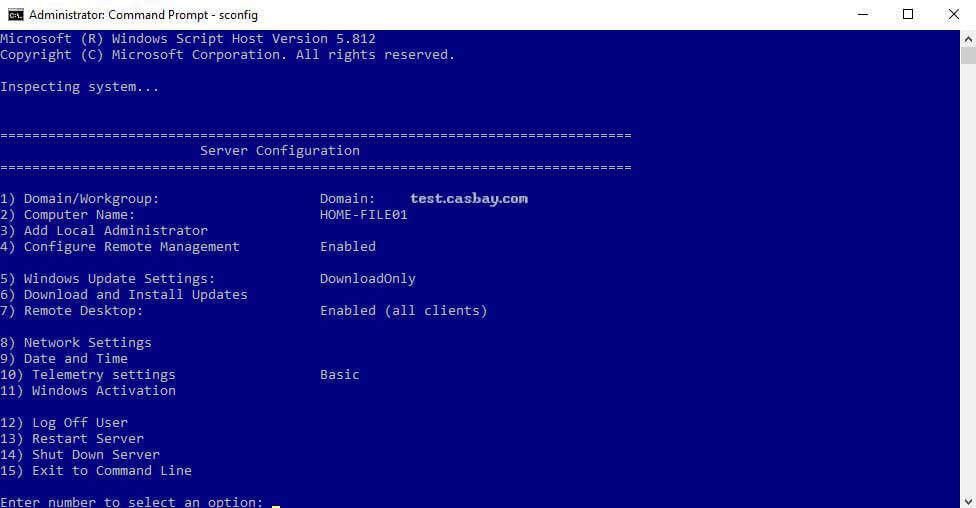
Firstly, open an elevated command prompt window or PowerShell session.
Step 2 of 4
After that, type sconfig and press enter.
Step 3 of 4
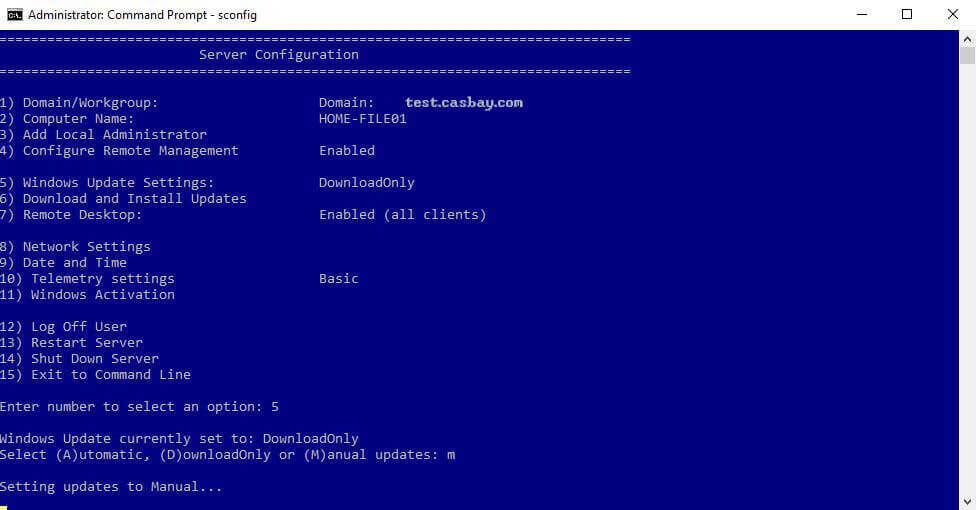
Next, select option 5.
Step 4 of 4
Now select one of the options:
- “A” for automatically download and install updates
- “D” for download only
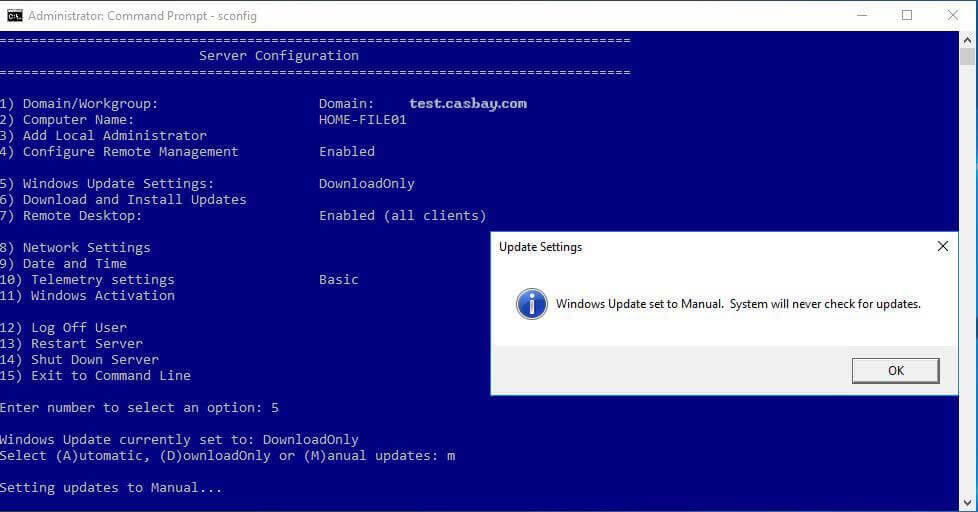
- “M” for Manual updates.
Below are the reference screenshots:

Command selection option

Select option 5

Pop out update settings message
You now know how to disable automatic updates on server 2016. Searching for more? Well, perhaps you can find them out in our Knowledge Base.


